
Get organized with a digital notebook
Introduction (00:04)
Most of us collect a lot of information on a daily basis. We take meeting meetings, we collect articles of interest, and we jot down ideas and thoughts. No matter if you have modern tablet or if you’re working on a traditional PC, OneNote is a fantastic tool for organizing information. In this video you will learn how to get started with OneNote, how to create notebooks, how to effectively organize your notes and how to quickly find what you’re looking for.
Getting an overview of OneNote notebooks (00:34)
We are planning an offsite company event. I’m going to create a OneNote notebook to gather information related to the event. To open up OneNote on my Windows 8 laptop, I’ll just search for it. I’ll open up Windows Search by pressing the keyboard shortcut Windows key + S and start typing in OneNote. The full desktop version with the richest functionality is called “OneNote 2013”.

OneNote always opens up where you last left off. On the left hand side, in the navigation pane, you can see a list of all currently active notebooks. Here you can see that I have 4 notebooks. Click on the arrow next to the notebook name to expand the view to see the full contents. The first notebook contains my work-related notes.
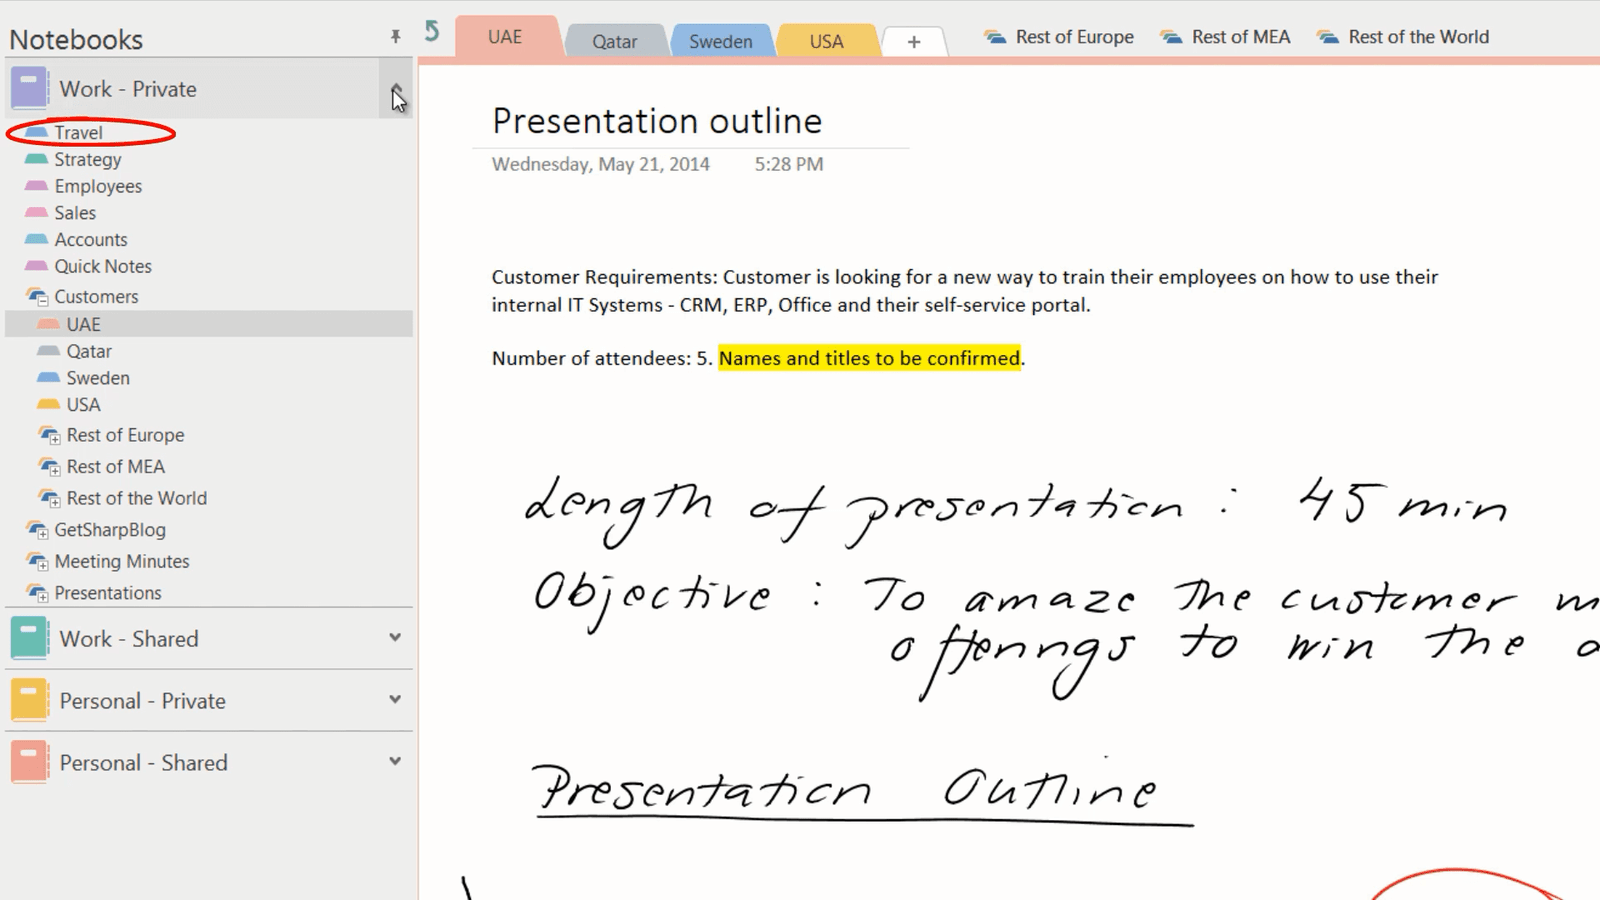
Here I gather information related to my travel, thoughts and ideas on strategy, customer information, blog articles and so on.
Notebooks are organized into sections, pages and subpages. You can also create section groups that contain multiple sections and more section groups.
I have one more notebook for work. This is a shared notebook that members of my team have access to and that we collaborate on.
I have a personal notebook where I keep notes related to purchases I’ve done, personal development and so on. The last notebook contains personal information that I share with my husband, things related to the family, investments and vacations.

If you don’t want to see the full list of notebooks, you can collapse it by pressing the push pin. To select which notebook to use, just click the drop down arrow. Personally I prefer seeing the notebook navigation so to open it up just press the drop down arrow and press the push pin again.
Creating a new notebook (02:31)
Now I want to create a new notebook for the off-site company event. To create a new notebook, click “FILE” and then ”New ” Here you need to decide where to save the notebook. By saving your notebook to SharePoint or OneDrive you can access it from a wide range of devices, your notebook is securely backed up and you can share it with others. Here I’ll select to save it to my OneDrive business account in a folder I’ve created for my notebooks.

I’ll give the notebook a name, “Company Event 2015” and then click “Create”. Once the notebook has been created you’ll be asked if you want to invite other people to share the notebook with you, here I’ll select “Not now”.
Creating Section Groups, Sections, Pages and sub-pages (03:17)
When you create a new notebook a section and a new page is automatically created for you.

Every time a page is created in OneNote, the date and time of creation is added to the page. Here I’ll write the page title “Event objective” and list some of the key objectives for the event.
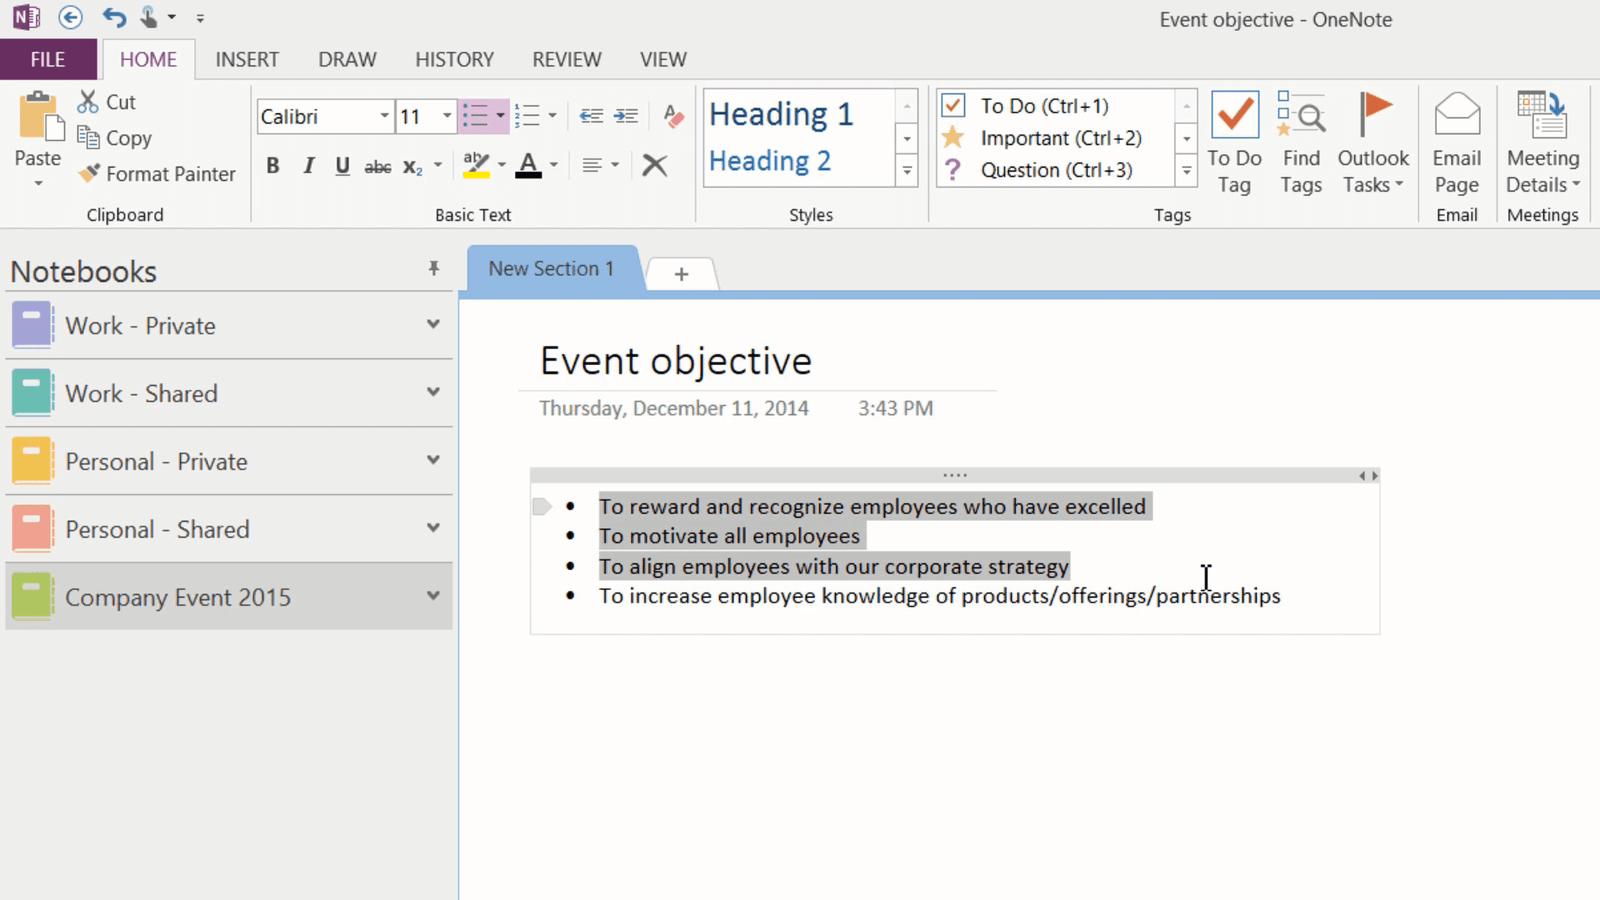
Unlike in other Office applications, you never have to think about saving your work in OneNote. Everything is automatically saved for you. I’ll right-click the “Section” tab and select “Rename”.

I’ll name this section “General information”. To add a new page click the plus sign where it says “Add Page”. Here I’ll add a page with proposed dates for the event.
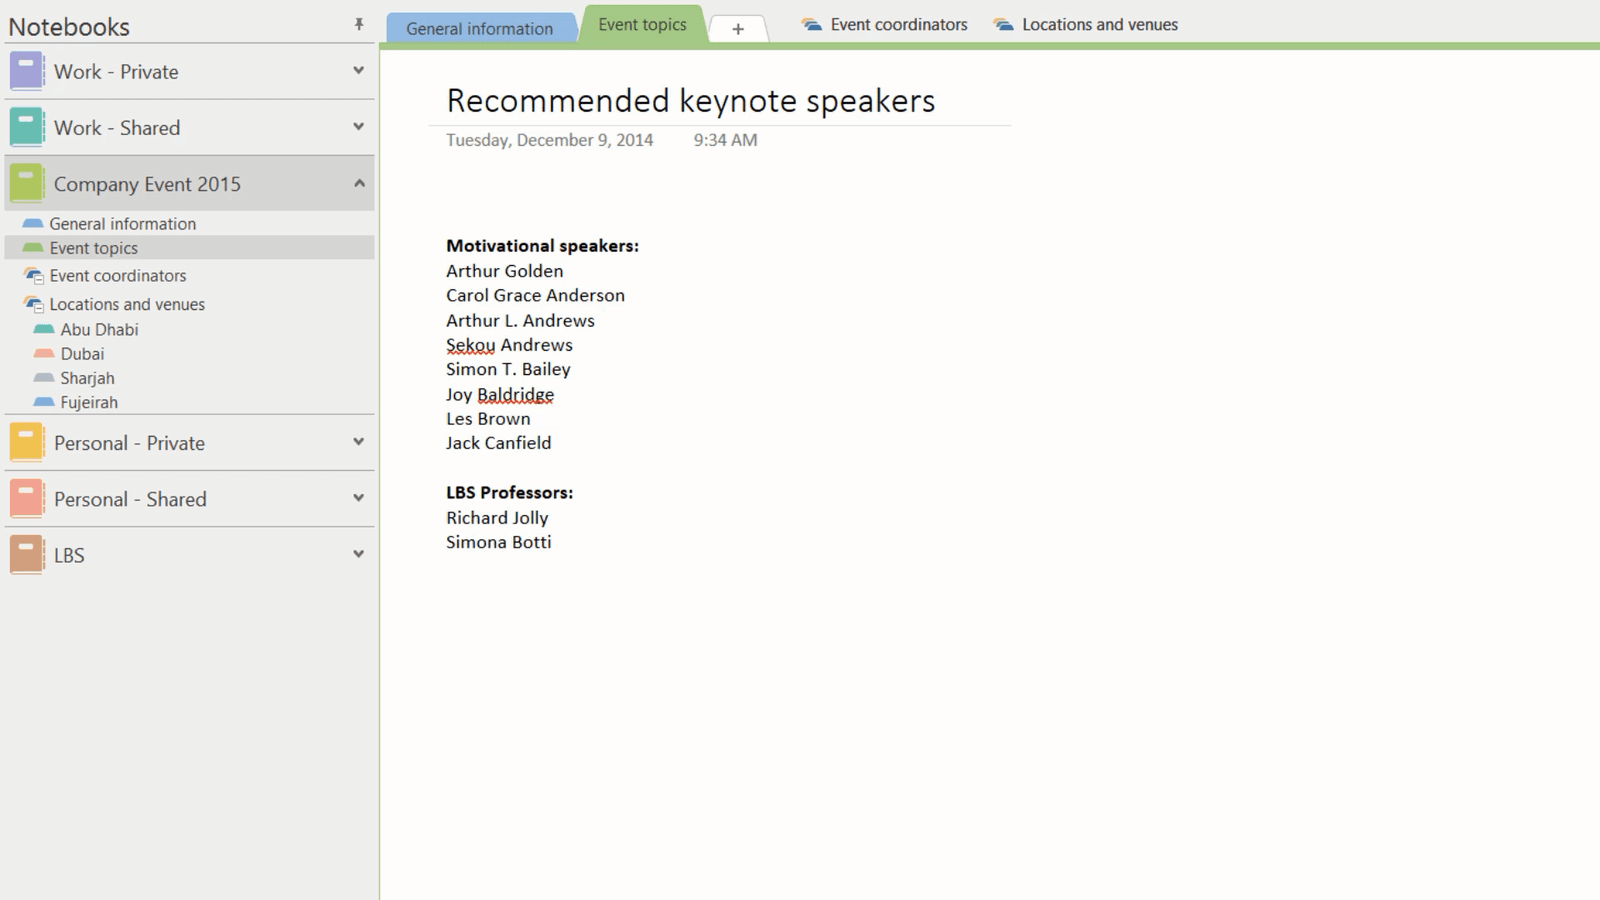
To add a new section click the tab plus sign and give it a name, I’ll name this “Event topics” and then I’ll add some initial thoughts about the keynote.
To create a section group, right-click above the page and select “New Section Group”. I’ll name this “Locations and venues”.
Inserting screen clips (04:24)
I’ll name the first section “Abu Dhabi” and create a page with general information about Abu Dhabi from Wikipedia.
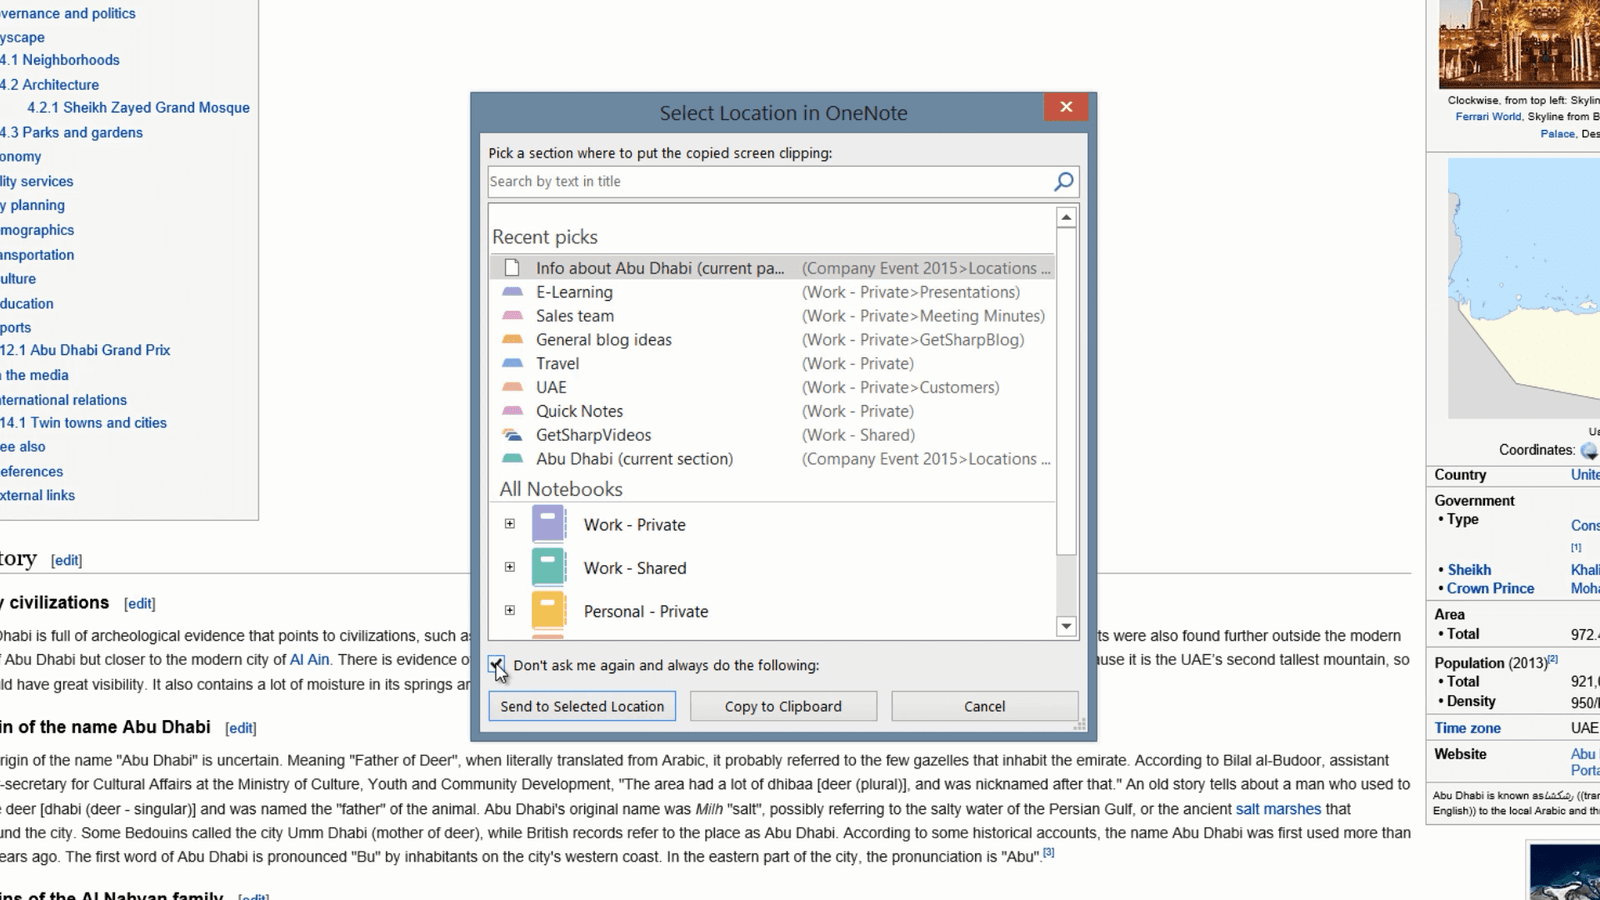
To insert a screen clip into OneNote open up the web page or application you want to take the screen clip from, here I’ll open up Internet Explorer and do a search for Abu Dhabi on Wikipedia. Here, I’ll scroll down to see the information I want to take a screen clip of. Open up OneNote again, click the “INSERT” tab, and then “Screen Clipping”. The most recent application opened will go white, hold down the left mouse button and select your clip.

The clip is saved to your notes together with the link to the web page, as well as the date and time the clip was taken. Another, quicker way to do this is to open up the window you want to capture a screen clip from, press the keyboard shortcut Windows key + S or Windows key + Shift + S if you are using Windows 8.1 or later. You will be asked where you want to place the screen clip. I’ll select the current page. If you always want to place the screen clip in the current OneNote page, mark that option and then check the box, “Don’t ask me again and always do the following”. Then click “Send to Selected Location”.
Open up OneNote and there is the screen clip.
I’ll continue to add more information about the planned event to the notebook.
When you add a new page, the page is placed at the bottom of your page list. If you want to place a new page somewhere else, place your marker where you want to add the page and click the little arrow with a plus sign.

Here I’ll add a page about things to do in Abu Dhabi.
Re-arranging your notebooks (06:10)
You can easily re-arrange notebooks, sections and pages. To move a notebook, hold down your left mouse button and drag it to where you want it. You can also right-click and select to move it up or down.

To move a section hold down the left mouse button and drag and drop it to the desired location in the notebook navigation pane, or open up the section group and re-arrange sections there.
Unfortunately you can’t change the order of section groups, these are sorted alphabetically by OneNote.
To move a page within the same section just drag and drop it within the page list. To move a page to another section you can drag and drop it onto the desired section. The page is moved to the end of that section page list. Another way to move a page is to right-click and select “Move or Copy”.

A window opens up where you can select where you want to move the page. Select the desired location and click “Move”.
You can also arrange pages into different levels using subpages. To organize pages into subpages, mark the pages while holding down “CTRL” on your keyboard, right-click and select “Make Subpage”.
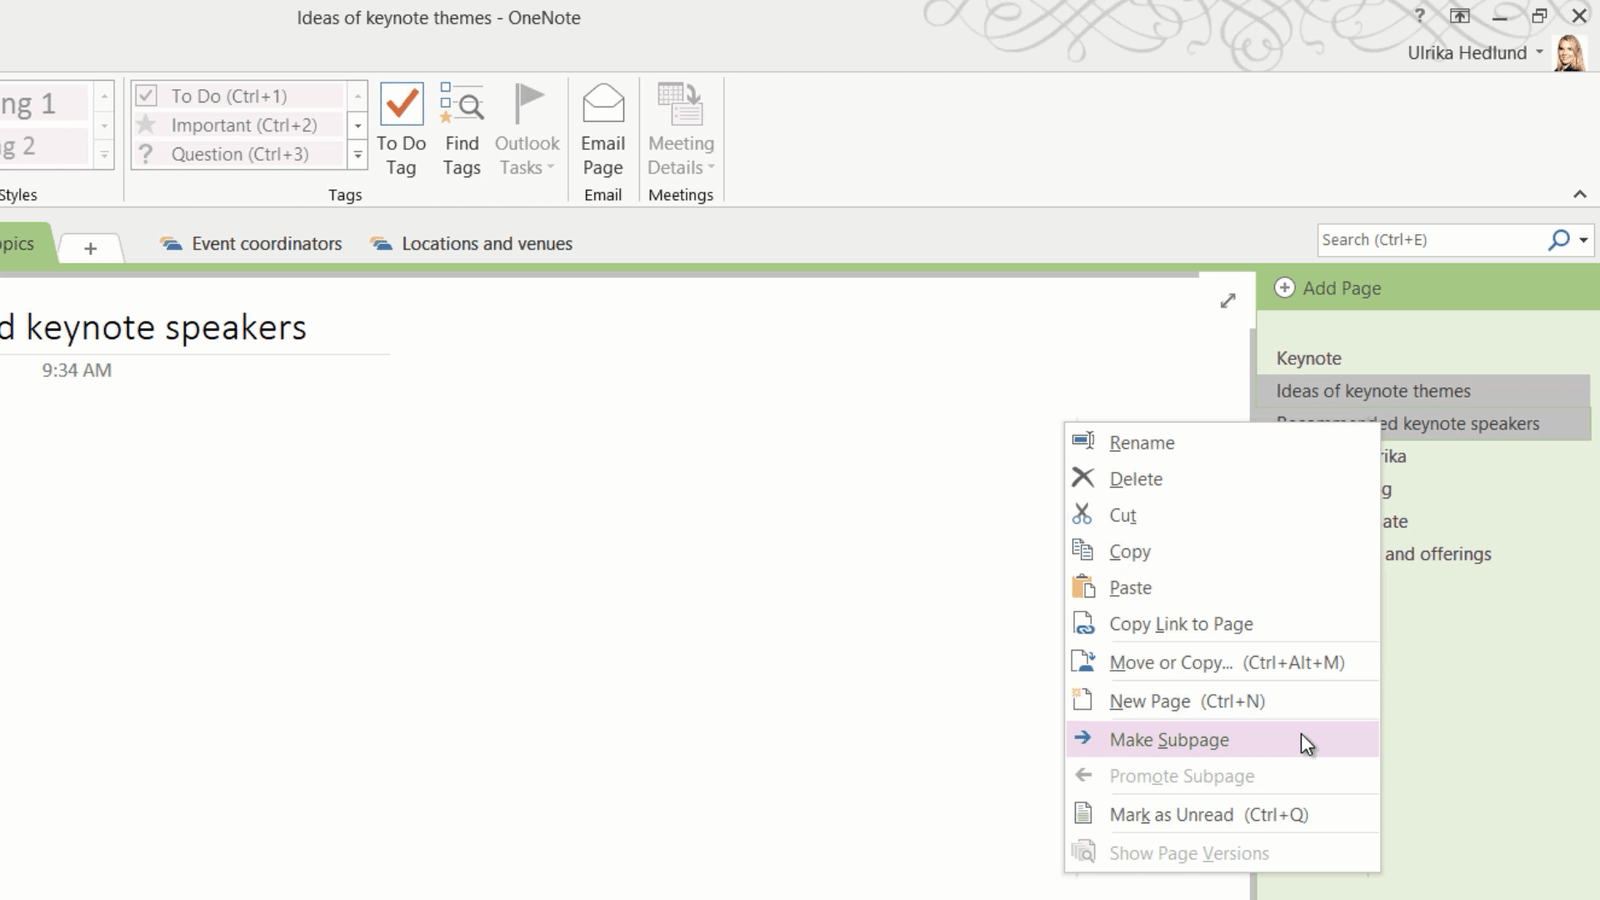
The pages are indented so that you can clearly see that they belong to the page above. You can collapse your subpages by clicking the arrow on the top page, to expand the pages again just click on the arrow and the subpages become visible.
Opening an old notebook (07:48)
I’d like to invite some external inspirational guest speakers for the keynote. Here I’d like to add the name of the professor I had in Brand Management at London Business School. I don’t remember her name, but since I can access notebooks from years back in time I’ll open up my old notebook from when I did my executive MBA. To open up a notebook click “FILE” and then “Open”, navigate to the folder where the notebook is located. Here I’ll select my “Archived notebooks” folder and my notebook from LBS.

Select and click “Open”. My old notebook is added to OneNote.
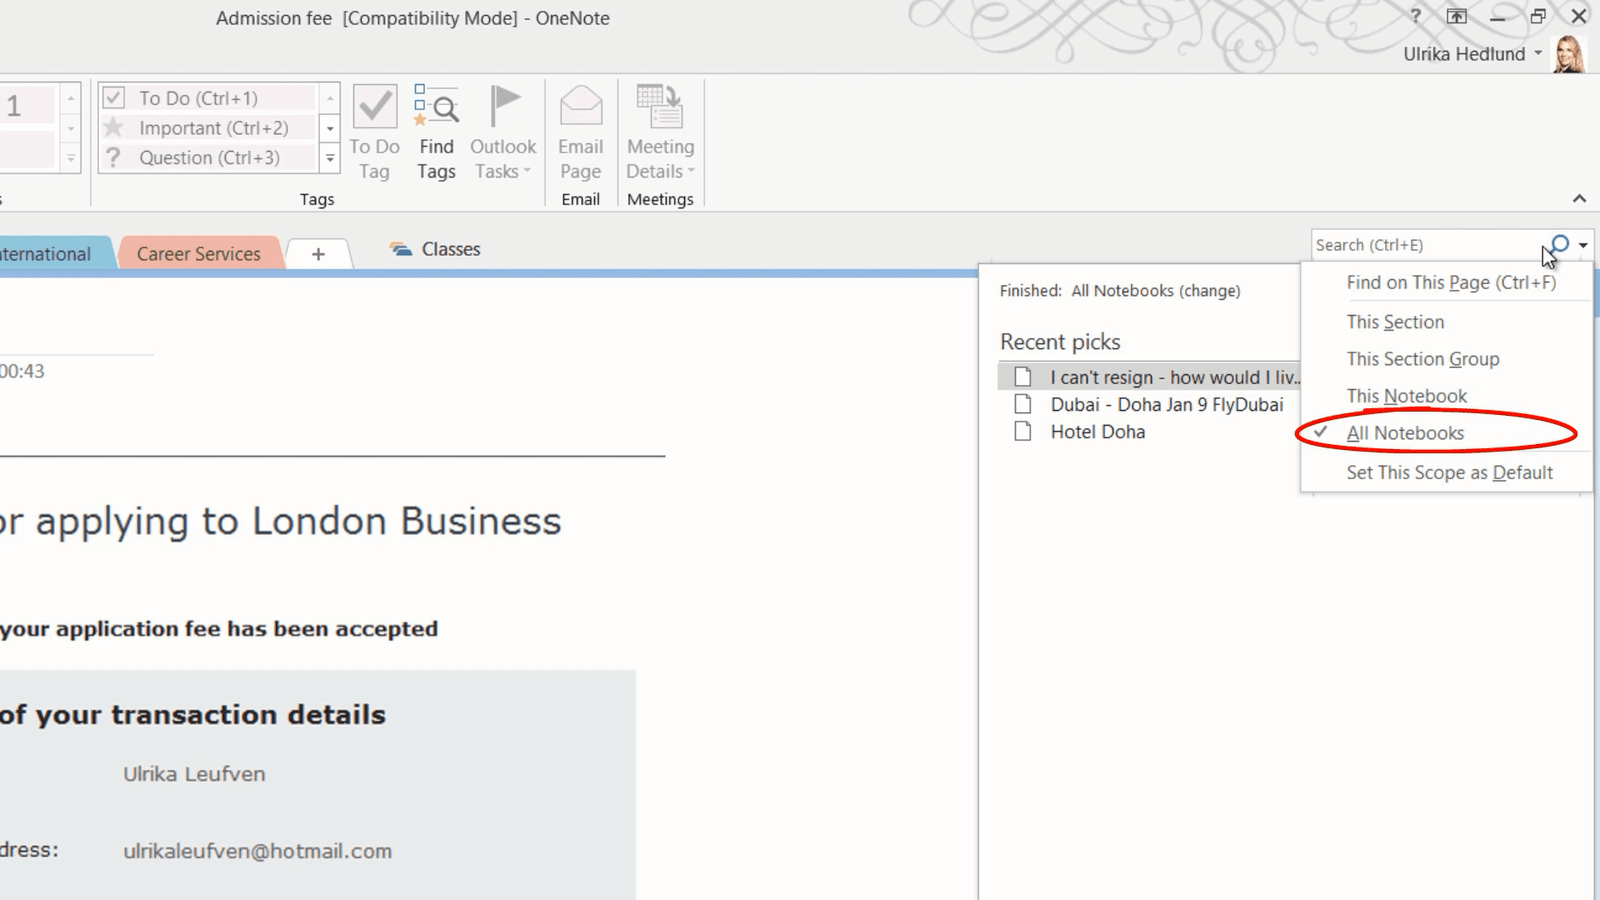
Searching your notes (08:27)
To search your notes, type in what you are looking for in the little search text box in the upper right corner, or press the keyboard shortcut CTRL + E. To change the search scope, click the little arrow next to the search field. I’ll leave the default which is “All Notebooks”.
To find the name of the professor I had in Brand Management, I’ll search for “Professor Brand”. I’ll select this page called “Elective Walkthrough”. Even though I’ve taken these notes by hand, OneNote can search them. To dock the “Search” pane, click “Pin Search Results”.

Here I can see that I’ve written down the professor’s name for Brand Management, however, I don’t know if this is the correct spelling. I’ll do another search for “Simona”. Here I have a screenshot from her lecture. The search engine is very powerful. It can even search for text in images. Here I can see that her name is written in the bottom of the lecture slide. Now I can go back to my page of potential guest speakers and add her correct name to the list.
Closing a notebook (09:37)
Since I don’t need the notebook from LBS anymore I’ll close it down. To close down a notebook, right-click and select “Close This Notebook”. This doesn’t delete the notebook, it just removes it from the notebook list view.
Closing (09:52)
Now that you know how to organize your notes, you’ll save a lot of time.
Leave a Reply